Installing a domestic oil tank is a significant investment for homeowners who rely on oil for heating and hot water. This guide will walk you through the essential aspects of domestic oil tank installation, covering regulations, types of tanks, installation steps, maintenance, and safety considerations.
Understanding Domestic Oil Tanks
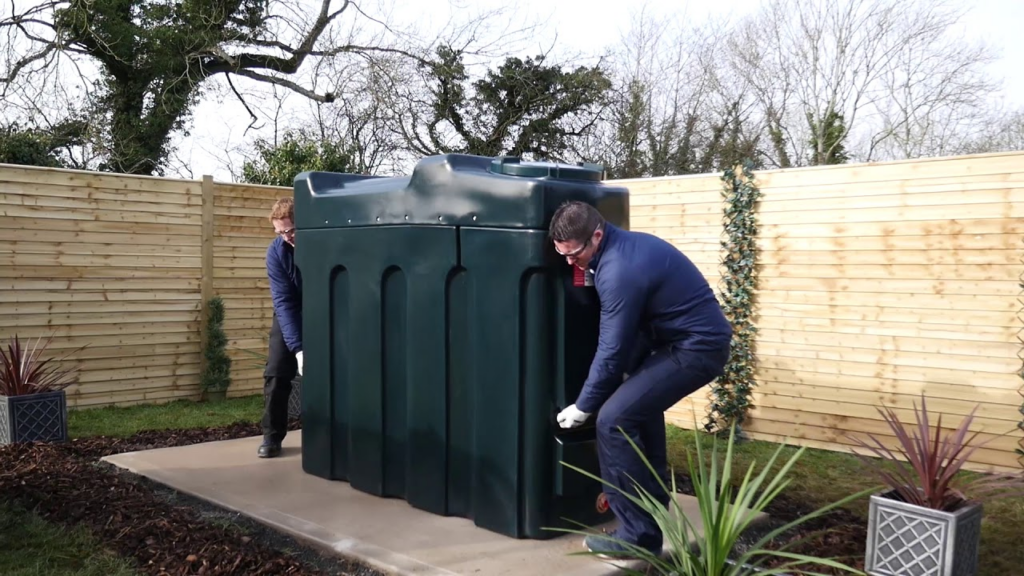
Domestic oil tanks are used to store heating oil for residential properties. These tanks can be located above ground or underground and come in various sizes and materials. Understanding the different types of oil tanks is crucial for homeowners considering installation.
Types of Domestic Oil Tanks
- Above Ground Tanks: Typically made of steel or plastic, above ground tanks are easier to install and inspect. They require adequate space and should be positioned away from sources of ignition.
- Underground Tanks: These tanks are buried beneath the ground and can save space. However, they are more challenging to install and maintain. Proper corrosion protection is essential for underground tanks to prevent leaks.
- Double-Walled Tanks: These tanks offer an additional layer of protection against leaks, making them a safer option for both above ground and underground installations.
Regulations and Permits
Before proceeding with a domestic oil tank installation, homeowners must familiarize themselves with local regulations and obtain the necessary permits. Each region may have specific requirements regarding tank installation, including:
- Distance from Buildings: Many jurisdictions require tanks to be a certain distance from buildings and property lines to reduce fire risks.
- Environmental Regulations: Local environmental agencies may impose restrictions on underground tank installations to protect groundwater from potential contamination.
- Permits: A permit may be required for both the installation and the subsequent operation of the tank. Ensure compliance with local codes to avoid penalties.
Preparing for Installation
Preparation is key to a successful domestic oil tank install. Here are some steps to consider:
Site Assessment
Conduct a thorough assessment of your property to determine the best location for the tank. Factors to consider include:
- Accessibility: Ensure the tank is easily accessible for delivery and maintenance.
- Drainage: Avoid areas prone to flooding or water accumulation, as this can compromise the tank’s integrity.
- Proximity to Utilities: Keep the tank away from utilities and other structures to prevent interference and enhance safety.
Choosing the Right Tank
Selecting the appropriate tank size depends on your household’s oil consumption and the available space. It is advisable to consult with an oil supplier or installation professional to determine the best fit for your needs.
The Installation Process
Once the necessary preparations are complete, it’s time to move forward with the installation of your domestic oil tank. Here’s a breakdown of the typical installation process:
Step 1: Excavation (for Underground Tanks)
For underground installations, excavation of the tank site will be necessary. Ensure that the excavation meets the required dimensions for the selected tank size.
Step 2: Foundation Preparation
A solid foundation is essential for both above and underground tanks. The foundation should be level and made of materials that can support the weight of the tank when full.
Step 3: Tank Placement
Carefully position the tank according to the manufacturer’s instructions. For above-ground tanks, use a proper support system. For underground tanks, place the tank in the excavated hole and ensure it is correctly aligned.
Step 4: Piping and Connections
Connect the tank to the existing heating system, ensuring that all piping is securely fastened and leak-proof. Professional installation is recommended for this step to ensure safety and compliance with regulations.
Step 5: Filling and Testing
Once the connections are made, fill the tank with oil and conduct a thorough inspection to check for leaks or other issues. A qualified technician should perform this testing to ensure safety.
Maintenance and Safety Considerations
Regular maintenance of your domestic oil tank is crucial to ensure longevity and prevent leaks. Here are some key maintenance tips:
- Regular Inspections: Inspect your tank annually for signs of rust, corrosion, or leaks. Address any issues immediately to prevent further damage.
- Cleaning: Keep the area around the tank clean and free of debris to prevent fire hazards.
- Monitor Oil Levels: Regularly check the oil level in the tank to avoid running out and ensure optimal heating performance.
- Emergency Preparedness: Familiarize yourself with emergency procedures in case of a spill or leak. Have a spill kit available and contact local authorities if a significant issue arises.
Conclusion
A domestic oil tank install is a vital component of home heating systems, and understanding the installation process is essential for homeowners. By following this comprehensive guide, you can ensure that your oil tank is installed correctly and maintained properly, providing you with reliable heating for years to come. Always consult professionals for advice tailored to your specific situation and local regulations to guarantee the best outcome for your domestic oil tank installation.


